Now is possible use some STM32 in the ARDUINO IDE.
For do this follow the steps below.
- Download and install the Arduino IDE
- Launch Arduino IDE.
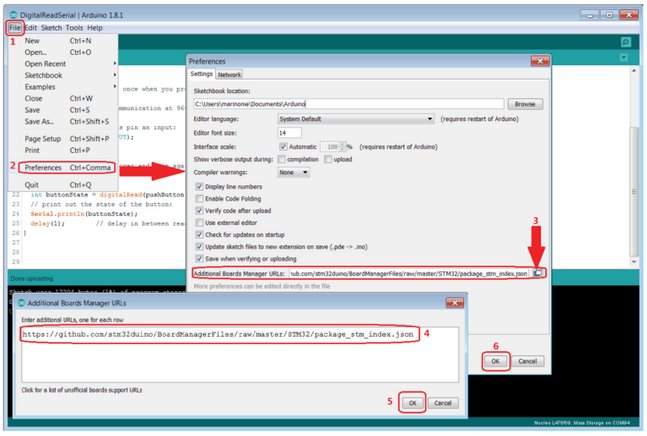
Click on File menu and then Preferences
The Preferences dialog will open, then add the following link to the Additional Boards Managers URLs field:
https://github.com/stm32duino/BoardManagerFiles/raw/master/STM32/package_stm_index.json
- Click OK twice, see below.
- Click on Tools menu and then “Boards > Boards Manager”
Next in the box n.4 type: stm32
and install all the boards that appears (5, 6 and 7).
See below.
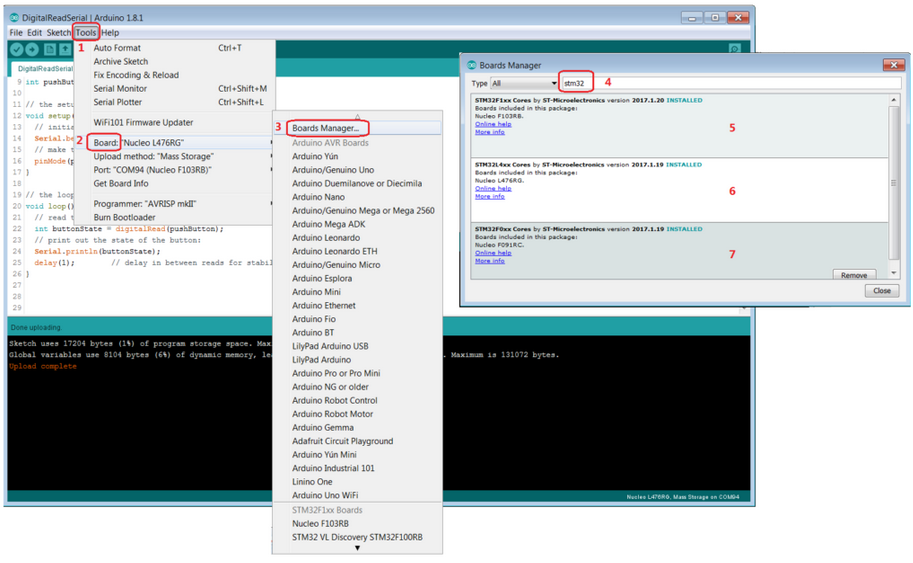
- Now select again: Tools > Boards and choose the STM32 board that you want to use.
See below, I selected the NUCLEO L476RG

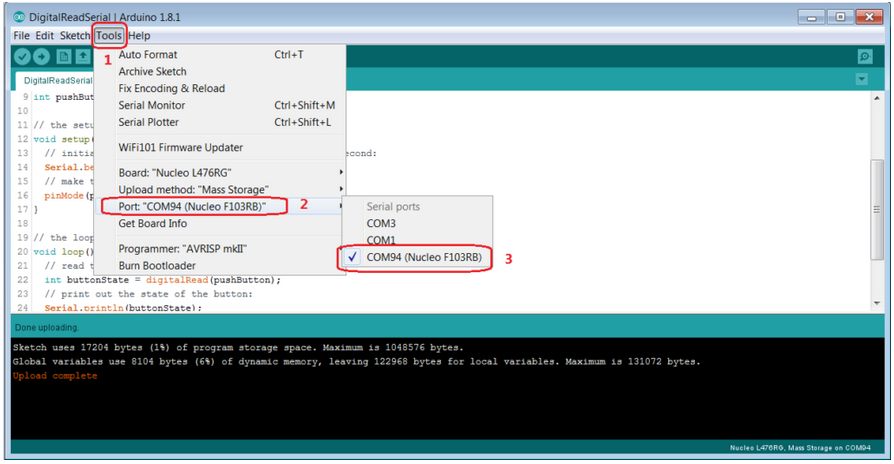
- Now select: Mass Storage, see below.
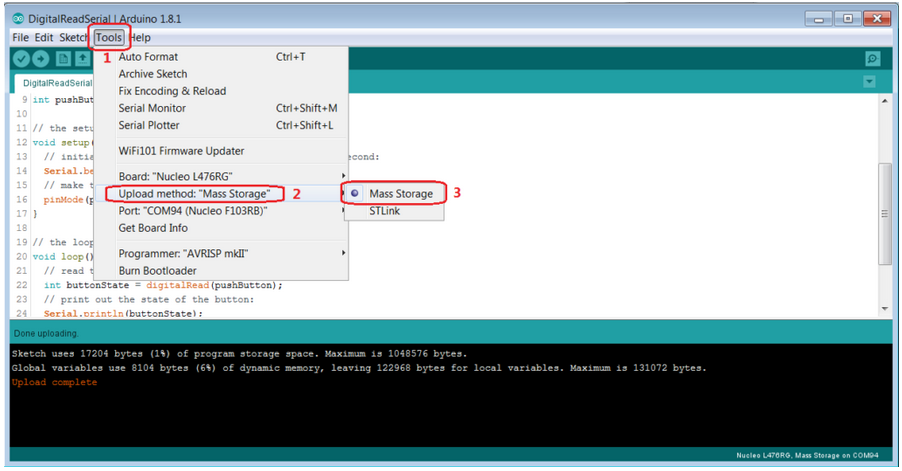
- And now select the COM port where is connected your NUCLEO L476RG, see below.
Do not worry if it gives you an indication of a different board, in my case indicates NUCLEO F103RB.
There is a problem of identification in the current IDE version but it works.
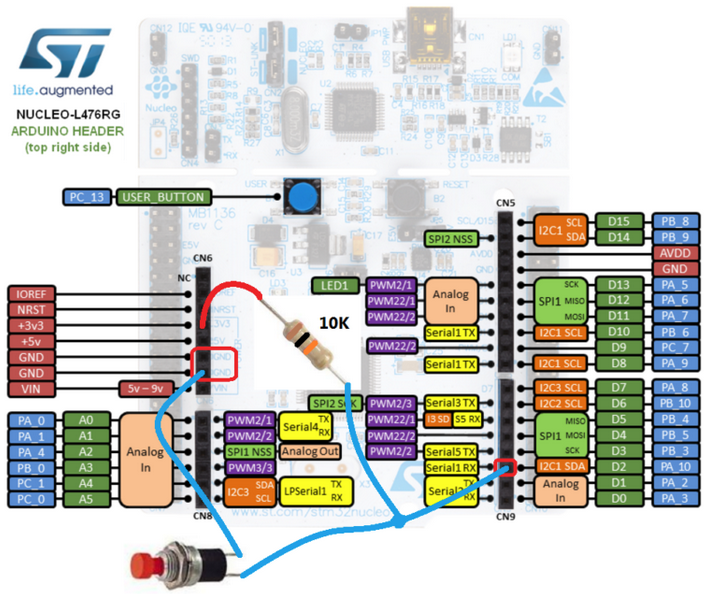
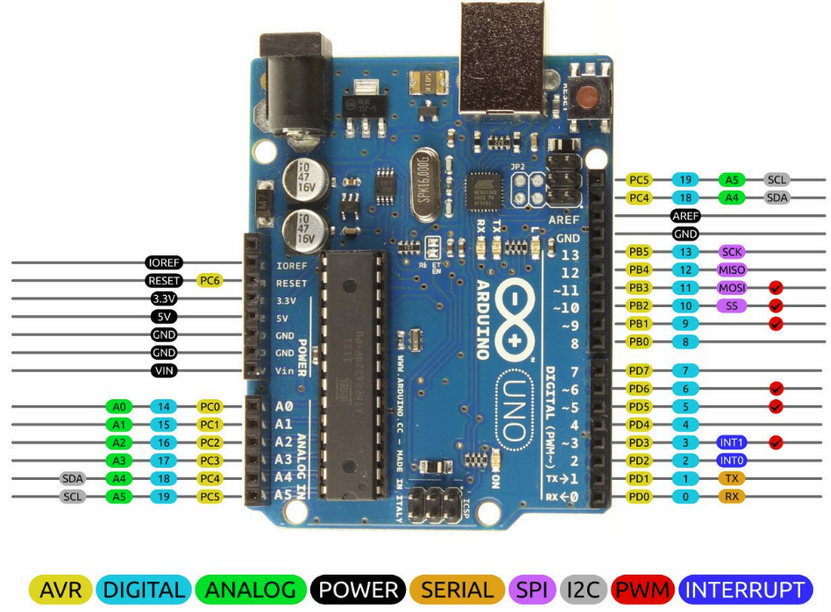
Remember: for address the I/O of the NUCLEO-XXX board you must refer to pinout of Arduino Uno R3, see below the light blue box (pin_1 … pin_19).
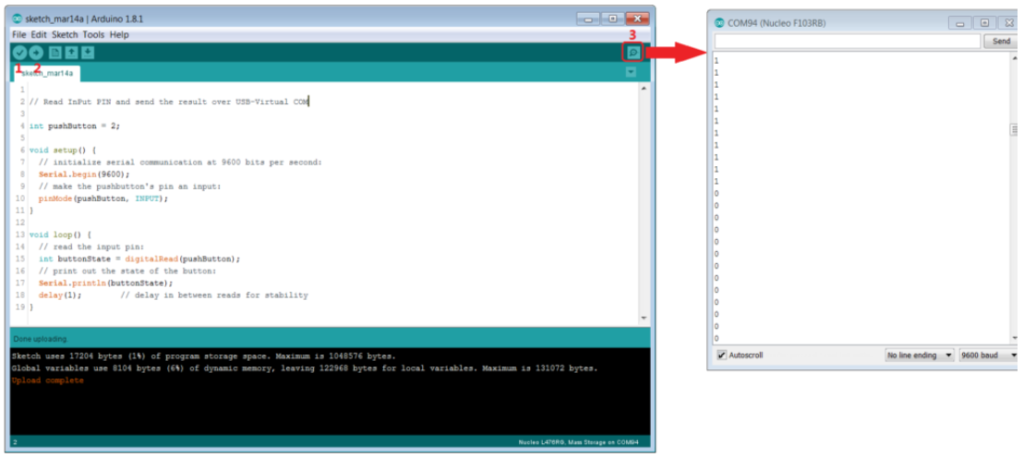
- Now try to read one Digital InPut and send the result via USB Virtual-COM.
Select: FILE > NEW
and in the window that appear type the code below.
// Read InPut PIN and send the result over USB-Virtual COM

int pushButton = 2;

void setup() {

  // initialize serial communication at 9600 bits per second:

  Serial.begin(9600);

  // make the pushbutton's pin an input:

  pinMode(pushButton, INPUT);

}

void loop() {

  // read the input pin:

  int buttonState = digitalRead(pushButton);

  // print out the state of the button:

  Serial.println(buttonState);

  delay(1);        // delay in between reads for stability

}
- Compile

- Download

- and press the icon of the serial terminal

You must see something like below.
Below there is the button connection on the NUCLEO-L476RG.
When you press the button, in the terminal you must see 0, if you release the button you must see 1.
The button is Normally Open.